FUN IN THE DIRT!
| Fun in the Dirt! Unit |
During this unit, students gain an appreciation for the important role decomposers play in food waste recycling. Through scientific experimentation students will compare the way that food waste breaks down in a sterile environment versus with an observation worm bin that they make. Participants explore the world under our feet learning about not only what soil is made of but also getting an in depth introduction to the many inhabitants of the soil. They learn firsthand through scientific experimentation just what would happen without decomposition. Scientific inquiry is the start of the STEM subject areas for this unit which also includes applied mathematics, measurement of samples, use of technology and basic engineering.
Objectives
Students will be able to: • make a compost pile; • list examples of nitrogen and carbon sources in the compost; • create a simple graph and pie chart Oregon Content Standards: K.1P.1 Compare and contrast characteristics of living and non-living things. K.4 Engineering Design K.MD Measurement and Data 1.1P.1 Compare and contrast physical properties and composition of objects. 1.3 Scientific Inquiry 1.4D.3 Show how tools are used to complete tasks every day. 1.MD.J Represent and interpret data. 1.G.3 Partition circles and rectangles into two and four equal shares, 2.3 Scientific Inquiry 2.4 Engineering Design 2.G.3 Partition circles and rectangles into two, three, or four equal shares, 3.3 Scientific Inquiry 3.NF Develop understanding of fractions as numbers. 3.MD.3 Draw a scaled picture graph and a scaled bar graph to represent a data set with several categories. Solve one- and two-step “how many more” and “how many less” problems using information presented in scaled bar graphs. 4.2P.1 Describe physical changes in matter and explain how they occur. 4.2E.1 Compare and contrast the changes in the surface of Earth that are due to slow and rapid processes. 4.3 Scientific Inquiry 5.3 Scientific Inquiry 6.1P.1 Describe physical and chemical properties of matter and how they can be measured. ET.3.B Locate, organize and use information ethically from a variety of sources and media. ET.3.C Evaluate and select information sources and digital tools based on the appropriateness to specific tasks. ET.4.C Collect and analyze data to identify solutions and make informed decisions. Vocabulary compost, decomposer, organic, inorganic, tilth, humus, nutrients Garden Tasks o Chopping sunflower stalks and other garden materials to add to the compost pile o Sifting compost to add to the soil o Cover cropping to help protect the soil, keeping both it and the soil organisms warm during the winter o Tearing off old leaves from plants, weeding and adding all of this to the compost pile o Pruning bushes and trees and then chopping up the sticks to add to the compost pile |
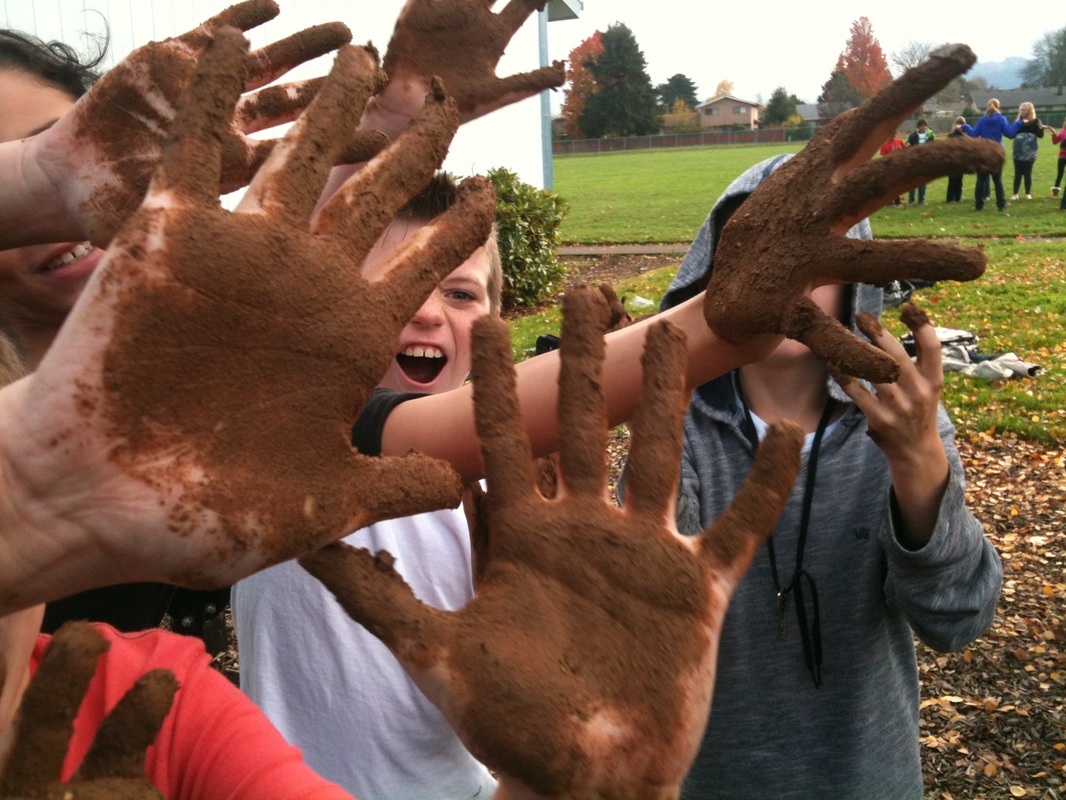
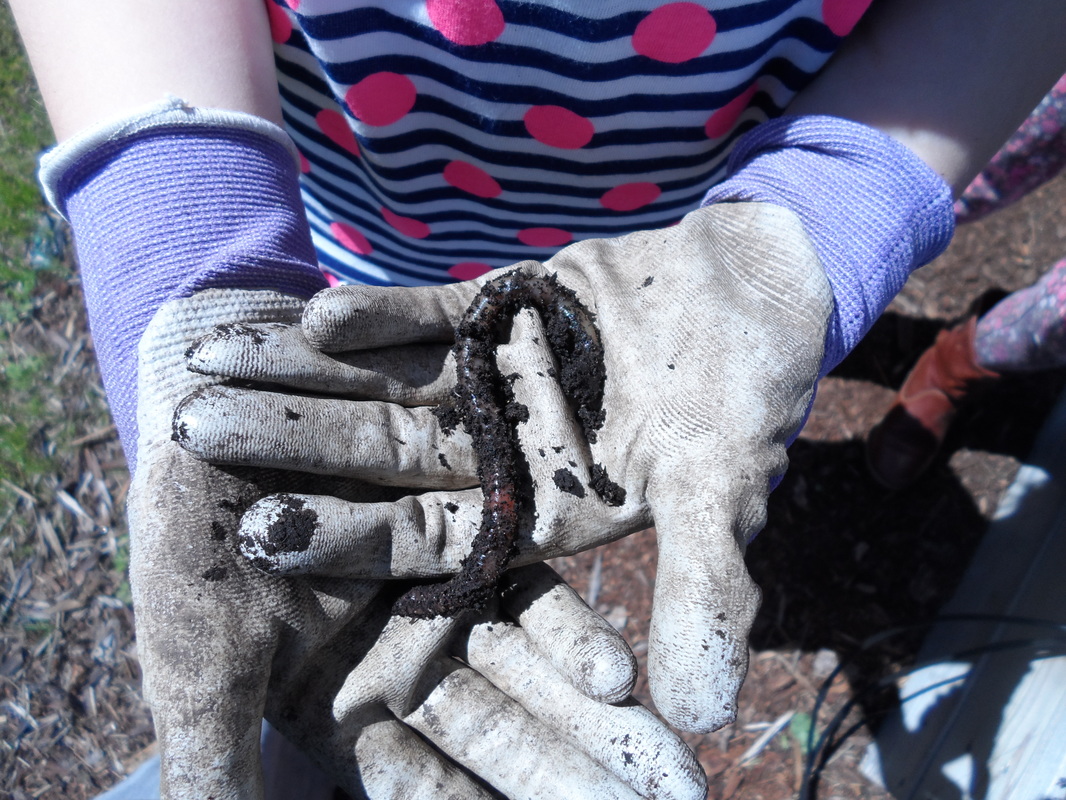
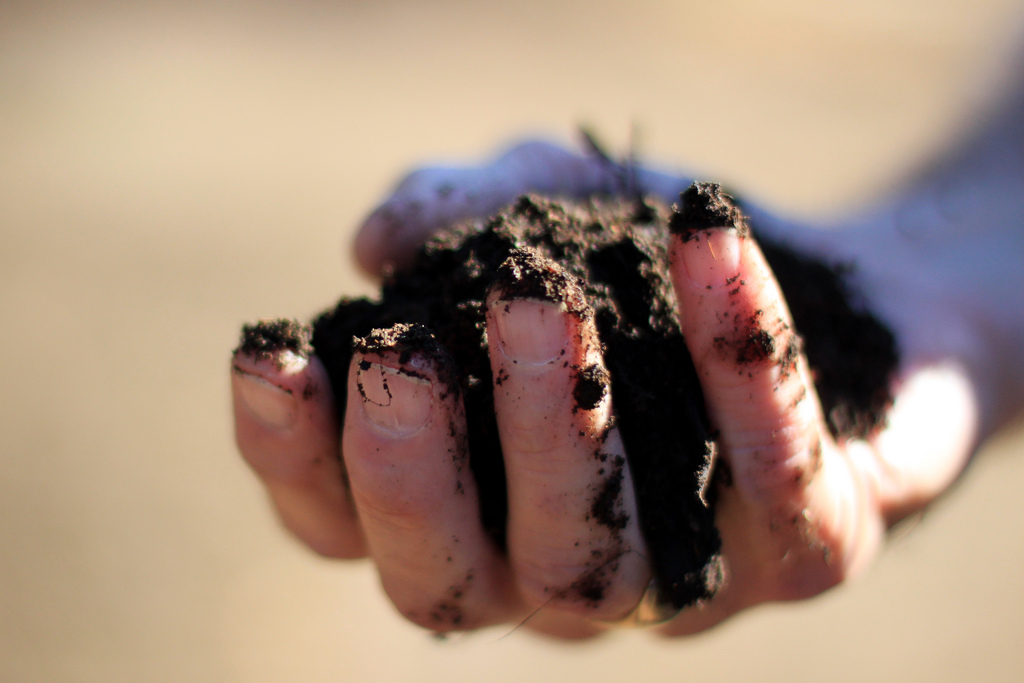
Background Soil Building PDF Soil Erosion PDF Soil is the backbone of any garden. It’s a complex mixture of water, air, minerals and organic matter (WAMO). Good soil for gardening has what’s called tilth- loamy, nutrient rich soil. Soilprovides the structure and nutrients that plants need to survive. The type of soil you’re working with in a garden tells you what plants to grow, how much and how often to water, what types of fertilizers and amendments you’ll want to use and even what type of garden beds you should make.There are four types of soil: sand, silt, clay and loam. Sand has the largest particles. It is made from small bits of rock and minerals. It’s loose, with lots of room for the easy flow of air and water, but has little nutrients. It also dries out quickly. A garden in sandy soils will need lots of organic material and compost added for water retention and nutrients. Silt is the next in size. It’s made from pieces of soil and rock and has more nutrients than sand. Silt is a productive type of soil for gardening. Clay is the smallest of the soil types, made of small mineral particles that stick together strongly. So much so that plants’ roots have a hard time growing through it. Clay is also very difficult for water to get through, causing water to sit on the surface of the soil when the ground is saturated or to only dampen the top layer of soil during dry months. It does, however, have a lot of nutrients that are great for plants. Loam is a mixture of all the three soil types and is the best type of soil for gardening. The sand allows for aeration of the soil, the clayadds important nutrients and the silt gives the soil body and fertility. Add some more organic matter in the form of compost and you have the perfect mix for a great garden. Whatever type of soil your garden is in, the gardening itself can be hard on the soil. All that digging and walking around has a tendency to compact the soil. Each plant you grow takes nutrients out of the soil. If you keep growing in one place, eventually you will exhaust the nutrients from that soil unless you add nutrients back. To have a garden that continuously produces, you need to take care of your soil just as much as you take care of your plants. A great way to replenish the soil in your garden is to add and make compost. There are many, many types of compost. Whatever its form, the basic recipe is still the same. First and foremost, everything that goes in your compost pile must be something that your soil creatures can digest, so no plastic, metal or glass. Soil creatures like organic matter of any kind. The best way to create your compost is to add alternating layers of what is called “brown waste” and “green waste”. The brown layer refers to carbon-rich items like: straw, sticks, wood chips and cardboard. The green layer is nitrogen-rich items that break down faster: food scraps, grass clippings, leaves, and manure. The greens add lots of nitrogen and nutrients, while the browns keep things aerated. A well-tended compost should be warm inside and will smell like moist earth. Compost that is stinky, oozy or is really cold and not actually decomposing means that you don’t have the right mixture of materials. Healthy compost pile, just like any humus, will be home to many organisms. You should find many types of macro invertebrates such as: worms, pill bugs, ants, beetles, springtails, etc. All of these creatures help to break down organic material by eating it, aerating the compost pile and pooping out soil. Fungi like mold and yeast also help to break down organic materials. The decomposer that does the most work in a compost pile is bacteria. You can’t see these microscopic creatures at work but you’ll be able to smell them. Aerobic bacteria, which needs a good amount of oxygen to survive, creates that rich soil smell and lets off the heat you want in your compost. Project Making Compost Length- two 1 hour sessions (plan/make compost), 15 minutes over multiple days/weeks (data collection) Materials- access to internet, compost books, paper, pencils, shovels, compostable materials, materials for building bin- optional Preparation- decide if there are enough materials in the garden to start a compost pile, gather materials 1) Have students first brainstorm why it is important to keep garden soil healthy. Add to that the question of how they can keep the soil healthy. Give them 10 minutes to do this. One way to keep soil healthy is to add compost. Explain that they will be making compost for the garden. You can do some of the compost activities listed in this module to give them basic information. Then the students will do some on-line and in book research to determine the best way to build a compost pile. Or bring in a Compost Specialist to talk to the students about making compost. Questions for them to answer: o What should go in the compost? o What order and amount of each material should go in the pile? o How big should the compost pile be? o Where should the compost go? Older students can get a little more in depth with this. If your garden doesn’t already a bin system of some sort to contain the compost, older students could make a compost containment system along with the compost itself. 2) Next, students will create a compost recipe, breaking down the materials they use into parts: 1 part coffee grounds, 5 parts straw, 2 parts sunflower stalks, etc. as well as weighing them. (They could make this into a compost pie chart.) They will gather materials from the garden and possibly outside sources. If you do this in the fall, you should have plenty of material in the garden itself. You can have the whole group make one pile together, or you can have smaller groups each make their own compost pile based on their own recipe. Older students who are also designing a bin system will need to have a design/plan for the bin system as well. 3) Over the next few weeks, students will watch their compost pile, measuring how quickly it breaks down over time. Take temperature readings with a compost thermometer, measure the size of the pile over time, note the smell and appearance of the pile, take soil tests. 4) Lastly, have students use the data they collected to create a graph of the changes over time in their compost pile. They will use this information to determine how well they felt their compost worked. Would they change their compost recipe if they did it again? If you had multiple piles/types of compost, students can decide which compost did the “best”. Discuss how you decide what the best compost is. Extension- Once the compost pile is established, there are a lot of experiments you can run using your compost. You can add it to existing beds and take soil nutrient tests before and after. Compost piles are perfect for invertebrate population studies. You can also do some germination tests to see if the compost was hot enough to break down weed seeds or not. Or you can bury objects made of various materials to see how long it takes them to break down in the compost. If you don’t have a lot of compostables or space, but would still like to teach students about compost, you could make a simple worm bin. Because they’re contained, there are a lot of easy experiments students can run with the worm bin- how long does it take for the worms to break down food scraps, what’s the average worm population in the bin over time, etc. Worms Eat My Garbage is a great worm bin resource. STEM Professional Connection: Have a compost specialist with your city/county come talk about compost with the students. Some cities have compost demonstration areas. Going to visit one if there are any nearby your school would be a great short field trip. The activities below can be used to introduce or review the project concepts. WAMO Length- 10 minutes Materials- glass jar, rocks, leaves/sticks, water, white board, dry erase marker Preparation- gather materials Start by asking the class, “Why soil is important?” Then talk about the parts of soil with the acronym WAMO (water, air, minerals, organic matter). Give each small group a cup with one of these things in it: nothing (representing air), water, rocks/minerals, leaves/sticks (organic matter). Give them a minute to look at what is in their cup, decide what they have and how it relates to soil. Write WAMO somewhere for the students to see. After a minute explain that you need four things in order to have soil. Bring out your “magic” soil making jar. One at a time go over each part of WAMO. Go to the table group with that part and have them dump it in the jar (even the air). When everything has been added, shake up the jar dramatically and then show the students the jar. Ask them if you now have soil. Explain that you don’t. There’s one last step before these things will become soil- they need to break down or decompose. Explain that it can take a long time to make new soil, which is why we need to take care of the soil we have. The Perfect Soil Length- 10 minutes Materials- sand, silt, clay, compost, water, cups, spoons Preparation- gather materials Pick a good spot to do this activity where it won’t matter things get messy. Let the students create their own loam mixture using sand, silt, clay, organic matter/compost and a bit of water. Explain that making good garden soil is like making a chocolate cake. You want it to be moist but not too wet, dark colored because dark soil has more nutrients in it and mixed up really well. You can use spoons to add the different soil types: 4 parts sand, 4 parts silt, 2 parts clay and as much compost as they think is needed until you get that dark rich color. Soil Bingo Length- 15-20 minutes Materials- soil bingo cards, dry erase markers Preparation- gather materials. This is a fun activity to get younger kids (K-5) thinking about soil and noticing all the little things that can be found in the soil. Pass out a soil bingo card to each student. Go over the boundaries for the activity. Whenever they find something they should come back to their assigned adult to get their card marked. Once they’ve got a bingo, they can go for a black out. For older students, have them explain what part of WAMO the thing they found is each time they come up to have their card marked. Sand, Silt, Clay Relay Length- 15-20 minutes Materials- example sand, silt, clay, compost, loam Preparation- gather materials, review the types of soil. This activity teaches students about the various soil types and their properties. Have the students sit down. Pass around examples of each type of soil for them to examine (sand, silt, clay, loam). Ask them to be thinking about which type of soil they think is going to be best for growing gardens. Have a show of hands for each of the four types of soil to see which one they think will be best. Then explain that you are going to do a demonstration to find the answer. Tell them to line up shoulder to shoulder. Explain that they are all going to be the different types of soil. First they will be grains of sand. Have them spread apart so that their fingers are touching. Ask for a volunteer. This volunteer is going to represent water. Water will weave his or her way between all the grains of “sand” under the arms. Time how long it takes water to get through all the grains by having the group count out loud. Once they’re done ask how difficult it was for water to get through the sand. Explain why it wasn’t very hard and how this might affect garden plants. Go through each of the other soil types, using the information below. Pick someone new to be water each time and keep timing them. If all goes well, it should take more seconds for them to get through clay than silt or loam and even less for sand but that depends on the kids picked to be water and how fast they are. To offset any weird timing results discuss the difficulty level of getting through each type of soil. Soil Type Kid formation Soil Characteristics Sand Students stand in a line facing you with fingers touching • largest of the four types of soil • particles visible by the naked eye • a lot of space between particles, doesn’t stick • dries out too much on hot days for plants to survive well • low in nutrients Clay Students link arms and stand with little space between (remind them that they can’t push in their legs to keep water out) • smallest of the soil types • sticks together very strongly • really hard for water to get between the particles • areas like wetlands with standing water often have clay soils • high in nutrients Silt Students stand with their hands on their hips, elbows touching • in between clay and sand in size • more nutrients than sand, but less than clay • holds some water, not too much Loam A mixture of the first three. Some students linking arms, some elbow to elbow, some with fingertips touching • Best type of soil to grow garden plants • a mix of the three other soil types • Sand keeps the soil aerated, clay add nutrients, silt gives it body • Last ingredient is organic matter in the form of compost. Texture by Feel Length- 10 minutes Materials- dried soil samples, water, texture by feel sheets Preparation- pick a spot to do this that can get messy, bake the soil types to dry them. Doing this activity will show students what sort of soil they have in their garden and let them compare that soil to other types of soil. Give each group of three or pair a sample of a different type of soil to test using the texture by feel directions. Caution them to only add a very tiny amount of water to their soil. If they add too much the activity won’t work well. After they’ve all practiced on one type of soil, have all the students test a sample of their own garden soil to see what type they have. It’s best to collect a sample of soil from 5 or 6 inches below the soil surface and it is best if it’s dry. Use this activity to discuss how to improve the soil fertility in their garden. Habitat Critters Tag- Compost Version Length- 15 minutes Materials- picture of soil/compost food web Preparation- set boundaries for the game This is a fun way for students to learn more about the various creatures that live in compost piles. Show students a picture of the soil web of life. Explain that there are many creatures that live in the soil and help to break down the organic matter we put into the compost pile. Split the students in half. Half will stand along one side of the playing field, the others will line up on the other side (shoulder-to-shoulder lines). The two groups now face each other. One of the groups will be soil decomposers. The other group will be organic matter. In order to make compost, soil organisms need both “green” and “brown” types of organic matter. Make up some sort of hand sign for Carbon and Nitrogen. The two groups turn to face away from each other. Each student will pick one of the signs. When you say, “Go”, both sides will turn to face each other. The decomposers will hold up the sign for what they want to eat and the organic matter line will hold up the sign for what they are. The decomposers will then run to the organic matter group. They have to find someone who is holding the same sign to pair up with. If they find a match, they bring that person back with them to the decomposer line and now both are decomposers. Anyone who doesn’t find a match dies and becomes part of the organic matter side. Play a few rounds. The population of the decomposers will fluctuate based on how much food there is for them to eat. After a bit, add in a soil predator. Anyone tagged by the predator becomes part of the organic matter line. If they are in a pair when tagged, they both go back to the line. Soil Life Hunt Length- 10-20 minutes Materials- hand lenses, insect jars, insect ID books Preparation- gather materials Let the students get into small groups or pairs and search for soil organisms in the garden. Explain to them that soil organisms are really small. Emphasize that they’ll be looking for very tiny creatures; otherwise you’ll end up with a ton of worms and not much else. The underside of rocks and sticks or an already established compost pile are all great places to look. Using the insect ID books, have them identify what they found when they are done. Organic/Inorganic Length- 10 minutes Materials- trash and compost bags Preparation- gather materials In order to be able to make compost, students have to understand what things can go in the compost and what things can’t. Organic things are those that are alive now or were once alive- people, leaves, bark chips, cow manure. Inorganic matter is something that isn’t alive and has never been alive- water, air, plastic, metal (you can argue the point with some of these things, but this is the simplified version). We only put organic matter in compost piles because it decomposes. Inorganic matter can take longer than a lifetime to break down so it’s not worth it for us to add it into our compost. Give small groups of students a bag of both organic and inorganic objects. Have them separate their objects into those two groups. Explain that anything in the organic pile can go into the compost. Compost Relay Length- 10 minutes Materials- compost cards Preparation- mark the compost and not compost pile spots This is another activity that focuses on what can and can’t go into the compost pile. Split the students into two group who will stand in a single-file line. Hand a compost card to the first person in the line. They have to run forward and drop the card either in the compostable or not compostable pile and then run back to tag their next teammate, who will pick up the next card. The first group to place all their cards wins. Check to see how accurate the two groups were with what can and can’t go into the pile. Worm Observations Length- 10-20 minutes Materials- plates, worms, worm bin, worm observation sheet Preparation- gather materials, review the worm observation sheet Start by going over what worms do for gardens: o Worms are decomposers- they eat dead plant and animal material and turn it into soil. o They turn and aerate the soil as they tunnel, keeping it soft for easy digging and letting oxygen in which plant roots need in order to take in nutrients and water. o They move nutrients from the top of the soil down to where plant roots are by eating fresh nutrients from the top of the soil (like leaf litter in a forest or compost in the garden) and depositing it in the form of casting (worm poop) toward the bottom layers of the soil where the plant roots are. Next, explain that you are going to be passing out worms for them to observe scientifically. Ask the students to tell you what they think that means. (They will be making observations and hypothesis based on those observations so they can learn about their worms.) Make sure to emphasis that they are looking at the worms to learn about them, not just to look at them. Have them list again the reasons why worms are important to gardens and remind them that they’ll want to take care to not harm their worms during their observations. Now finally pass out a plate with a worm and some soil on it to pairs of students, along with a hand lens and ruler. (Make sure that you are doing this in a shady place if you’re outside in the garden to not dry out the worms.) Have the students measure how long their worm is and see what kind of worm they think they have. See how long the longest and shortest of the worms are. Talk about some of the common types of worms. Then go on with the observations, following the Worm Observations sheet. Bacteria, Worm, Centipede Length- 10-15 minutes Materials- none Preparation- set up the playing area with markers for the safe zones and the starting line This is like an action version of rock, paper, scissors. In this game: o Worm beats Bacteria o Centipede beats Worm o Bacteria beats Centipede This mimics the lifecycle of these compost creatures. Worms eat bacteria as they feed on organic matter. Centipedes are worm predators. And when centipedes die, bacteria break them down. Have the group pick hand signs to represent each of these three creatures and go over which beats which. Split into two teams. Each team will first pick whether they want to be Bacteria, Worm or Centipede. Everyone in the team needs to be the same thing. Once they have decided, they will come to stand at the starting line, back to back with the other team. When you say, “Go!” they will turn around and show their hand sign. Whichever team beats out the other, will chase the loosing team back to their safe zone (a few yards away). For example, if one team was Centipede and the other was Bacteria, the Bacteria team will chase the Centipedes. Anyone who is tagged will go to join the team who tagged them. Then they play again. Eventually, everyone will be on one team and that team wins. If both teams pick the same creature for a round, it’s a draw and they both pick again. Decomposer Tag Length- 10-15 minutes Materials- optional armbands Preparation- set up the boundaries for the game In this game there will be worms (decomposers), vegetables and people. Pick two students to be people and two to be worms. Everyone else is a vegetable. Within the playing area you set up, the people chase and try to tag the vegetables. Once tagged, the veggies sit down. They can only get back up to play more if a worm comes and tags them. Complicate this by allowing the people to tag worms too or adding in a worm predator like a robin. If worms are tagged they too must sit down and can only be revived by another worm. |
