USING THE HARVEST
Objectives
Students will be able to: • follow a recipe; • make their own simple recipe; • determine average garden production • list options for the use of extra garden produce Vocabulary stem, leaf, roots, flower, fruit Garden Tasks o Harvest from the garden o Taste things in the garden o Cook with things in the garden Tasting Etiquette It’s very important to talk about how to taste with kids. Gross faces or kids spitting things out makes other students less likely to try new things. Let students know that everyone’s sense of taste is different and that each student should have the chance to make their own decision about taste. • Try a tiny amount to start- if you like it you can have more, if you don’t, it’s small enough that you can swallow it. • Keep negative comments and faces to yourself. • Spitting things out is unacceptable, that’s why you should only take a little to start. • Instead of saying they like or dislike like it, encourage students to describe the taste. Oregon Content Standards: 1.3S.3 Describe why recording accurate observations is important in science. 3.0A.A Represent and solve problems involving multiplication and division. 3.0A.D Solve problems involving the four operations, and identify and explain patterns in arithmetic. 3.NF.F Develop understanding of fractions as numbers. 3.MD.2 Measure and estimate liquid volumes and masses of objects using standard units 4.DM.I Solve problems involving measurement and conversion of measurements from a larger unit to a smaller unit. 4.2P.1 Describe physical changes in matter and explain how they occur. 6.1P.1 Describe physical and chemical properties of matter and how they can be measured. ET.2.A Interact and collaborate with peers, experts, or others employing a variety of digital environments and media. ET.2.B Effectively communicate and publish to multiple audiences using a variety of media and formats. |
Using the Harvest PDF
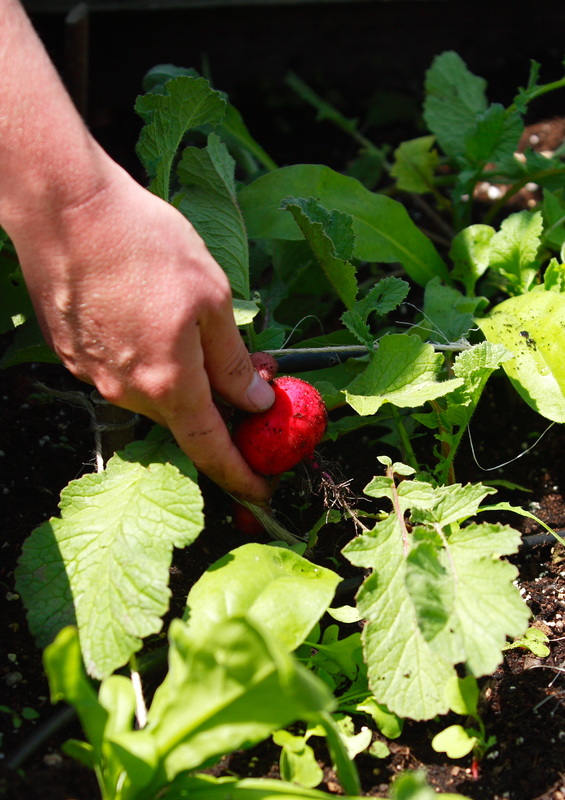
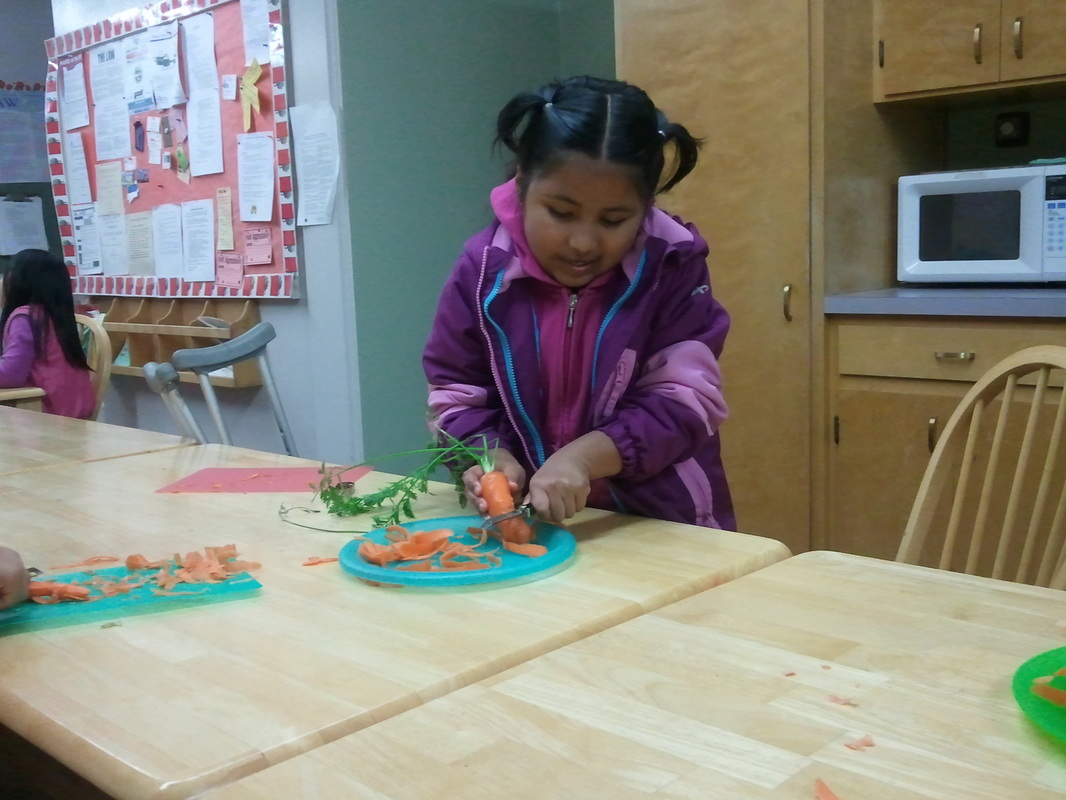
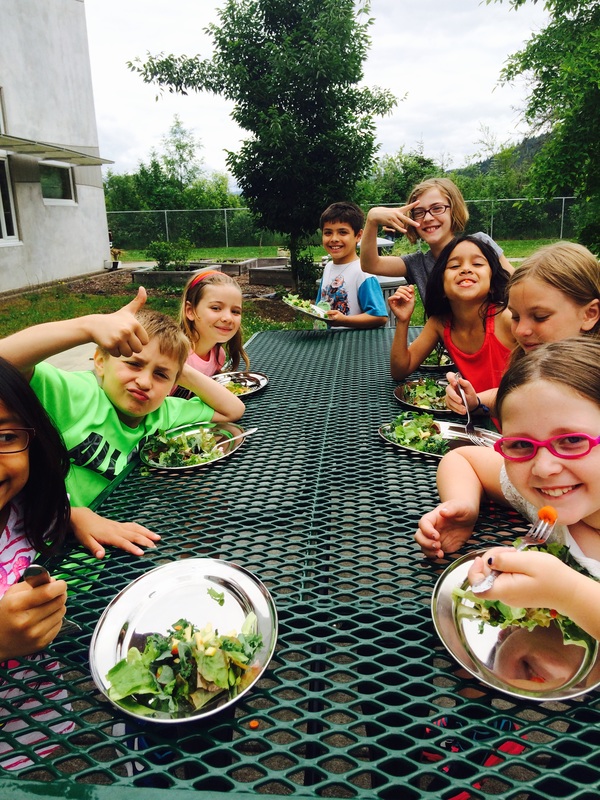
Background There are so many things that can be done with the produce grown in school gardens. It can be used during garden education with the kids who are doing the growing. It can be sent home with students to be used by families. Some schools have started their own produce stands where they sell produce to provide funding for their garden. Others have grown the produce to use in the school cafeteria or to give to homeless shelters. One of students’ favorite activities is to use the garden harvest to cook with. They love to be able to wash, chop, measure, stir and then eat what they’ve grown. Eating is the ultimate garden reward. Though cooking with kids can seem daunting at first, using these simple rules will alleviate a lot of stress and keep kids safe. o Do cooking tasks one at a time so it’s easier to keep track of what all the students are doing. Separate activities into distinct time frames- harvest, wash (hands and produce), chop/grate/tear, cook then eat. Breaking students up into small groups with an adult is ideal. o Wash hands with soap and hot water. If you touch your hair or rub your eyes, etc. you need to wash your hands again. Make sure that kids are just as aware of this as you are. Roll up sleeves and put hair back. o Wash any produce that you’re going to use, remove bad spots. o Students who are cutting and cooking with a burner need to be separate from the rest of the group in a quiet and calm space so they can focus on their task. o Go over knife safety with students. Show them the handle of the knife and the blade. Be clear that they can cut themselves if they aren’t careful. They should never touch the blade of the knife, just the handle. If the bade gets near to their fingers- they stop no matter what. Show them how to use the knife and cut. Encourage them to work slowly and carefully and take knives away from any student who doesn’t follow these directions. o When cooking with a burner, students need to be aware of a few things. Show them how the burner works, remind them that anything on or left near the burner is going to get hot enough to hurt them. Show them how to move the pan/pot with hot pads and how to stir without touching the hot pan. Students should keep away from the burner unless it is their turn to stir. Anyone not being careful will not get to help with the cooking. Cooking Rules adapted from Willamette Farm and Food Coalition’s Farm to School Program Food Safety Protocol and Knife Safety Sheets. The full documents are attached at the bottom of the Module 3 page, with more information on transporting and storing produce. Project Make A Recipe Length- three or four 30 min-1 hour sessions Materials- recipe books, paper, pencils, knives, cutting boards, measuring utensils, dishes, burner, pan, pots, various ingredients as needed: olive oil, vinegar, flour, sugar, baking power, etc. Preparation- gather materials, buy extra ingredients, review cooking safety 1) Have students brainstorm the best way to make a recipe. You could have a chief or cook come talk with the students about this and give them some tips. Encourage them to focus on what materials they have. Go out to the garden and see what’s there, show them what other materials they can use. You can choose to limit their options depending on age and resources. Here are some dish ideas from most to least simple/easy: o salad o stir fry/sauté o produce (zucchini, pumpkin, berry, etc.) pancakes o preserves 2) In small groups, students will first pick one or two things in the garden that they want to be the basis for their dish. They can research recipes that involve those ingredients to get ideas and then decide what sort of dish they are going to make. 3) Before students actually start designing their recipe, do the PB&J (or a variation if nut allergies are present) Sandwich activity. Each group will write out instructions for making a PB&J. Have an adult read and follow the directions to the letter, being as silly as possible whenever things are unclear. Use this to illustrate the importance of clear directions in the recipes they will be making. This is a great time to introduce students to various measurements, measuring devices and the practical use of fractions. 3) Next students will design their recipe. Go over cooking safety rules with the students and make sure that as they are using cooking gear, there is plenty of adult supervision. Each group will make 2-3 trial dishes, carefully taking notes and measuring their ingredients before deciding on the best version that they want to use as a recipe. 4) Finish by having student trade recipes with another group to make. Challenge them to figure out how to double or triple the recipe. They can post their recipes on-line for others to use and/or cook for parents and other students. STEM Professional Connection: Have a chief or cook come talk to the students about how they use math in their job and creating recipes. Using Extra Produce Length- 1 hour-3 weeks over multiple 15-30 minute timeslots (maybe longer depending on the type of project you and your students decide to take on) Materials- paper, pencils, clipboards, calculators, scale, computer/phone access Preparation- you may want to do some investigating of what options are going to be feasible for the extra produce at your school before you have students start this project 1) In school gardens there is often extra produce that isn’t eaten by students while they’re out in the garden. Having students help decide what to do with the produce is a great way to engage them more deeply in the garden and its future. First talk about this with students. As a whole group, make a list of all the things that you could do with extra produce: o sell it o start a farm stand o donate it to a local charity o make a big harvest meal for students and family o serve it in the cafeteria during lunch o have a tasting table at lunches o take it home to families 2) Before the group can decide on which of these they want to do, they’ll need to see how much extra produce there really is in the garden. Have the students brainstorm how they can figure this out. One way is to harvest things in the garden and then weigh the harvest with a scale. Ask the students if they think you should do this once or more often? It’s probably good to have an idea of how many pounds of produce you’re getting from the garden on a weekly basis. If you want to be really through, you can harvest things as they ripen everyday over multiple weeks and take that average. Otherwise, weigh your harvest during one week. You can use this data for various math applications. Another option is to take a sample of ripe produce from many different garden plants. Weigh a few of these to get the average pound of each. Then count how much more fruit/seeds/leaves/etc. are on each plant and extrapolate how many pounds are on each plant. Use the number of plants to figure out how many pounds of each type of produce will come from the garden. For example: o Take five or six ripe tomatoes and weigh them, coming up with an average tomato weight. o Count the number of tomatoes on a few of the tomato plants. Average these to figure out how many tomatoes each plant will produce. o Now use the average weight of a tomato and multiply it by the average number of tomatoes per plant. You now have the average pounds of tomatoes you will get from each plant. o Lastly, count the number of tomato plants in the garden. Multiply this again by the average pounds of tomatoes and you will know about how many pounds of tomatoes the garden will produce. 3) Now that you have an idea of how much the garden is producing, have the students decide what they want to do with the garden harvest. Some of these options will involve talking or sending emails to local charities, the school principal, district food purchasing staff and cooks. This should be mostly student led with help from adults so they can figure out the pros and cons of each option before settling on one to actually do. Some things to consider whatever they decide: o Will this be a one-time thing? o When will we do it? o Who will be in charge and who do we need to get permission from? o What do we need to set up to make it happen? o How much work is this going to be and how much time do we have? o Knowing what we know now, do we still want to do this? STEM Professional Connection: This project will require talking to a lot of professionals in the community. Making some of these connections ahead of time or figuring out who the students should email or call will be helpful. Students can speak to people in person, on the phone or through email. Activities The activities below can be used to introduce or review the project concepts. Garden Salad Length- 15-30 minutes Materials- produce from the garden, salad spinner, bowls, plates, forks, cutting board and knives Preparation- gather materials, buy dressing or ingredients to make it Make a garden salad with students. Salads can be made out of anything in the garden. They can be lettuce based but think about trying a tomato, cucumber or beet base as well. Don’t forget fruits and flowers in the salad. The more things students can put in the salad, the more interested they’ll be in it. Have the students harvest various fruits and vegetables for the salad in small groups. Make sure to be clear about how much of each thing they should be harvesting. Then wash, tear/chop or grate as needed before tossing it together. Try making up some homemade salad dressings as well. Berry dressings and a simple mix of olive oil and soy sauce are quite popular. Garden Stir-fry Length- 30 minutes Materials- produce from the garden, knives, cutting boards, plates and forks, camping stove w/gas, pan, lighter, wooden spoon, olive oil, soy sauce Preparation- gather materials, buy ingredients as needed This is a simple dish you can make with whatever is growing in the garden. Have the students collect produce and herbs to wash and then chop. Sauté the produce in a pan with some olive oil and soy sauce. It’s fast, easy and a tasty introduction to cooking for the kids. Garden Pancakes Length- 15-30 minutes Materials- flour, sugar, salt, baking powder, milk/water, vegetable oil, measuring cups/spoons, large bowl, stirring spoon, plates, forks, pan, spatula, camping stove/gas, lighter, cutting boards, knives, grater Preparation- gather and buy materials Pancakes are one of the easiest and quickest short breads you can make. Add in a camping stove and you can make them right out in the garden. Pancakes are also great because you can add tons of different garden produce- zucchini, berries, squash (precook to save time), other fruit. Or cut the sugar and make a savory version with- kale, tomatoes, spinach, basil, spices, etc. o 1 cup flour o 1 tbsp sugar o 2 tbsp baking powder o 1/8 tsp salt o 1 cup milk/water o 2 tbsp vegetable oil Drying Apples Length- 15-20 minutes, 24 hours to dry Materials- apples, dried apples, apple corer, citric acid or lemon juice, bowl, slotted spoon, food dryer Preparation- gather materials Harvest one apple per person. Put an apple on the apple corer and turn the handle until the apple is cored and sliced. Break apart the slices and put them in the bowl with citric acid or lemon juice. (Explain during the demonstration that the lemon juice keeps the apple slices from turning very brown. The brown doesn't taste any different, but most people like them to stay lighter.) Use a slotted spoon to scoop the apple slices out of the bowl and place them on the food dryer tray, with no overlapping. Let the apples dry for 24 hours. Jam Length- 30 minutes to 1 hour Materials- fruit, bowl for washing fruit and strainer for washed fruit, sugar, pectin, lemon juice, measuring cups and spoons, pot and burner, stirring spoon, containers for finished jam, if canning- another pot for sterilizing glass jars, tongs for removing them Preparation- gather materials, buy supplies as needed Have students harvest fruits from the garden- blueberries, strawberries or raspberries. Some students will wash the fruit while others measure out the amount of sugar, pectin and lemon juice you will need. Talk about the difference between canning jam and doing freezer jam. With canned jam you need to boil the jars to sterilize them. (Have an adult demonstrate this if you’re going to do it.) It is not needed if you make freezer or refrigerated jam. Follow the instructions on the pectin box. Let each student have a turn to stir or add an ingredient. When finished, pour the jam into jars or containers for the students to take home. If canning you will want to re-boil the now filled jars to seal them. Pumpkin (or any squash) Butter Length- 45 minutes Materials- knife, bowl for holding seeds, strainer for washing seeds, bowl for seeds to sit in salted water, salt, pre-cooked pumpkin, spoons for scooping, another bowl for pumpkin puree, smashing implements, sugar, spices, measuring cups and spoons, pot and burner, stirring spoon, containers, same extra ingredients as above if canning Preparation- gather materials, pre-cook squash To do this you’ll have three fast rotations or three groups. One will be cutting up a pumpkin and rinsing the seeds then letting them soak in salt water for later baking. Another will be scooping the cooked flesh from a pumpkin that you’ve already cooked from the rind and smashing it until it’s smooth. The last group will be cooking the pumpkin puree, adding the sugar and spices. Make sure that you go over each of these stations with the whole group before starting. Then get to work. If they are rotating, leave work for each group at each station. Finish by pouring the pumpkin butter into jars or containers that the students can take home. For every 1 1/2 cups pumpkin puree add: o 1 cup white sugar o 1 1/2 t ground cinnamon o 3/8 t ground nutmeg o 3/8 t ground ginger o 1/4 t ground cloves Salsa Length- 15-30 minutes Materials- many knives and chopping blocks, tomatoes, peppers, onions, garlic, cider vinegar, cilantro, salt, bowl, stirring spoon, chips to dip in salsa Preparation- gather materials This will require a lot of chopping. Harvest and wash the produce first. Then spilt into teams to get everything chopped. One group can stir ingredients as they’re added to the bowl or each group can get a chance to come up and stir. Children often don’t like hot things, so hot peppers aren’t needed unless they’re in the garden anyway. Student who are interested can add them later. o 5 cups tomatoes o 2 1/2 cups chopped and seeded green peppers o 2 1/2 cups chopped onions o 1 1/4 cups chopped and seeded hot peppers (optional) o 3/4 cups cider vinegar o 3 cloves garlic, minced o 1 tablespoon cilantro, minced o 1/2 tablespoon salt Willamette Farm and Food Coalition’s Farm to School Program Food Safety Protocol date: school: Know the source: Identify the farm from which the produce came: _____________________ ! Provide farms with ODA brochure “Keeping Produce Safe on the Farm” ! Interview suppliers about food handling practices and make notes ! Determine that practices are consistent with ODA’s recommendations ! Confirm that farm supplying produce has product liability insurance ! WFFC has product liability insurance ________________________ (name) supervised this activity and completed checklist Transportation from farm stand ! Inspect the produce for any visible rot or contamination ! Transport in a clean vehicle ! Transport only in clean, food grade containers that have only been used for food ! Transport produce quickly to its destination. ! Refrigerate perishable items at 41 degrees or below. ! Store food in a clean, dry location where it is not exposed to contamination and at least 6 inches above thefloor. ! Wash hands before handling food ________________________ (name) supervised this activity and completed checklist This Farm to School Program food safety protocol was developed by Willamette Farm and Food Coalition using the following resources: Oregon Department of Human Services Food Sanitation Rules US FDA Guide to Minimize Microbial Food Safety Hazards of Fresh-cut fruits and vegetables USDA Food Safety and Inspection Service website Lane County Public Health Food Handler Manual Oregon Department of Education Child Nutrition Program’s materials on Developing a Food Safety Program WFFC’s Farm to School Program Food Safety Protocol Cooking and Serving Fruits and Vegetables in Classroom Setting Date: School: Teacher: What we prepared: ! A person in charge holding a food handler’s card is designated ! No one who is helping is sick with a communicable disease, with symptoms such as coughing, sneezing, runny nose, diarrhea, fever, or vomiting. ! Any wounds or cuts on hands or wrists are covered with a bandage and gloves ! Clean equipment used for chopping, prepping or storing o Wash in hot soapy water o Rinse o Sanitize with sanitizing solution o OR run through dishwasher and allow to dry thoroughly ! Clean surfaces o Wipe surface o Sanitize with a solution of 1 tablespoon of bleach in 1 gallon of water. o Let the solution stand on the surfaces for a few minutes; then air dry or pat dry with clean paper towels. ! Wear clean aprons ! Wash hands before beginning ! Wash fruits and veggies (gloves aren’t needed) o Remove any dirt with veggie scrubber and water o Wash thoroughly under running water o Remove any rotten or damaged areas ! Servers don’t eat until the event is over ! Use only clean cloths to wipe hands or serving surfaces ! Wash hands after using bathroom, after touching body parts or unclean surfaces ! Serve immediately after cooking or keep hot at 140 degrees ! To taste food while cooking o Place small amount in a separate container o Step away from exposed food o Use a clean spoon o Set spoon aside to be washed o Wash hands afterward before returning to cooking or serving ! Clean all serving utensils o Wash in hot soapy water o Rinse o Sanitize with sanitizing solution o OR run through dishwasher and allow to dry thoroughly ! Servers wear gloves and change them if they touch unclean surfaces ! Food is served with tongs or spoons ! Kids don’t touch the food being offered ! Kids use clean bowls for seconds or are served without touching their bowl. ________________________ (name) supervised and completed checklist Farm to School knife safety instructions Have all kids wash hands with soap and water. Put cutting mats on tables And berry baskets for compost on tables and red bowls on tables. Have an example of everything we brought from farms. And a few ready to cut up during knife safety demo. Look what we brought back from the farm! (show them veggies) And we got a few other things from another farm (show them those) We’re going to do some cooking today. We’re going to make our own _________! Everyone is going to help make it and you’ll need to chop some things. We’re going to give you a knife for chopping. It’s a real knife. Its sharp. I could cut you if you’re not careful. So we’re going to show you how to be safe with your knife. This is important. If you’re not safe with your knife today we’ll take it away. Your knife has two parts. The handle which is plastic. Its either red or black. You should always hold your knife by the handle. The other part is metal. One side is flat. The other side is sharp and shiny (show them the edge). This part could cut you, so you shouldn’t touch it. In fact, you should never touch the metal part at all. Only touch the handle. Hold your knife by the handle. I’m going to show you how to cut some _____. I hold the___ with one hand and my knife with the other. I cut the stem off and put it in the compost basket on my table. Then with the rest, I take the knife and press, press, press and slide it a little. And when I get close to my fingers, even if I’m not done cutting it all, I STOP! Then I take some ____. I cut the stem off and put it in the compost basket on my table. Then with the rest, I take the knife and press, press, press and slide it a little. And when I get close to my fingers, even if I’m not done cutting it all, What do I do? (kids say YOU STOP!) Put it into the red bowls on your table, (or someone will come around to get it.) Great. When you are sitting and it looks like you are ready for a knife, someone will come around and hand you a knife. (hand out knifes) When you are sitting holding your knife in front of you by the handle, Someone will come around and give you some ____ to cut. When you’re done with that we’ll give you some _____ |
Objectives
Students will be able to: • sort or classify plant seeds they have collected • identify varying methods of seed dispersal • model or design seeds that use varying methods of dispersal • collect seed from one or more garden plants using appropriate techniques • tell one reason for saving seed Oregon Content Standards: K.MD.F Describe and compare measurable attributes. 1.MD.4 Organize, represent, and interpret data with up to three categories; ask and answer questions about the total number of data points, how many in each category, and how many more or less are in one category than in another. 4.NF.4c. Solve word problems involving multiplication of a fraction by a whole number, e.g., by using visual fraction models and equations to represent the problem. 1.1P.1 Compare and contrast physical properties and composition of objects. 1.3S.2 Record observations with pictures, numbers, or written statements. 2.2L.1 Describe life cycles of living things. 2.4D.1 Use tools to construct a simple designed structure out of common objects and materials. 3.3S Scientific Inquiry: Scientific inquiry is a process used to explore the natural world using evidence from observations and investigations. 4.3S Scientific Inquiry: Scientific inquiry is a process of investigation through questioning, collecting, describing, and examining evidence to explain natural phenomena and artifacts. Vocabulary Seed, dispersal, germination Garden Tasks o Save seeds o Search for weeds in the garden that are starting to form seeds or flowers, talk about why it’s important to pull weeds before the seeds fall. o Plant some seeds. o Harvest and prepare sunflower seeds to be dried (you’ll need salt, cups and water). |
Module 3: Developing a Locally- Based Food System
Seed Dispersal and Seed Saving Seed Dispersal and Saving PDF Background All living things have some system for reproducing members of their species. Most plants reproduce using a system that includes flowers and seeds. In general, seeds develop within the ovary of t he plant’s flower after either being fertilized by pollen from another plant of the same species or being self-fertilized. For a seed to germinate and grow into a mature plant, environmental conditions must be just right. Each plant needs a certain amount of sunlight, air, water, and nutrients from the soil. If a seed simply drops from the parent plant, it might compete with the parent for those essentials and have difficulty growing. Therefore, most seed-bearing plants have developed a way to disperse seeds away from the parent, giving the new plant a better chance to find what it needs to grow. Some plants produce very light seeds with sail-like or hairy outgrowths that enable them to be carried by the wind. For example, a maple seeds has papery wings that flutter like a helicopter, while a dandelion seed has a fuzzy parachute that carries it on air currents. Some plants, like Queen Anne’s lace, produce seeds with spines, hooks, or gooey coatings that catch on an animal’s fur or people’s clothing and are carried to distant places. Some plants, like raspberries, develop seeds within an attractive, tasty fruit. Those seeds are eaten by animals, carried in the animals’ digestive systems, and deposited in a different location when the animal defecates. Still other plants, like violets and witch hazel, have seeds that are ejected away from their parent plant. For example, witch hazel seeds develop within a pod that squeezes the seeds as the pod dries. When the seeds finally shoot out, they can travel up to 40 feet. Many of our garden plants have adapted and been bred to be dispersed by us, which in turn, makes it pretty easy for gardeners to save seed for the next growing season. Though saving seed can seem daunting at first, it’s really not very difficult or complicated and there are many good reasons to do it! (The information below is from the Seed Ambassadors Seed Saving Zine) Why Save Seeds? o To develop durable and a resilient, local food based system o To counter the loss of genetic diversity o To keep food tradition alive o To help a plant complete its entire life cycle o To improve your future crop through seed selection o To increase your independence and rely less on seed companies o To save money “Saving seeds is the foundation of developing durable and resilient locally based food systems. We are also losing diversity, biological and social, which limits our ecological and social resilience and adaptability within this changing world. About 75% of agricultural crop diversity is estimated to have been lost since the beginning of last century. Saving seeds is a powerful way to counteract this problem and have a profound effect on our future resilience and sustainability.” By saving your own seed we don’t need to rely on seed companies. These seeds are usually purchased from giant seed corporations and each year more and more seed varieties disappear, usually open pollinated and heirloom varieties. “You fully choose what you grow and the characteristics of what you grow, thereby escaping dependency on seed companies. You may not believe it at first, but your garden is much more dependable than a seed company. Often, one grower and distributor produces all of the seed for one variety for the entire US seed market. If there is a crop failure on that mega seed farm then your favorite bean that you have been growing for years may be gone for good.” Challenges to saving seed: o You don’t get to eat from the plant o Takes time o Many plants require isolation or a planting of >50 plants to render true seed (i.e. lack of space) Project Saving Seeds from the Garden to Grow Again Length- 1 hour to save seeds, 1 hour to do germination tests (over 2-3weeks) Materials- seed saving cards, jars, markers, bags, paper and pencils, dehydrator- optional Preparation- decide which seeds the students will be saving in the garden, save some seeds yourself using best practices 1) Students will save seed from the garden. Have the students first brainstorm why they would want to save seed. Use the activities on the Seed Saving Cards to help with this. 2) Next have the students go through different rotations in the garden, where they will save different types of seeds. At each station, they will determine the best way to collect the seed from each plant, deciding as a group how they think they can tell if the seeds are ready and what the best technique is for saving each type of seed. Things for them to think about: o Which plants are best to save seed from? o Will the seeds store best dry or damp? o How to get the hull off of the seed most effectively? o Where would be the best place to store seeds and in what? As students go through the stations, they should take notes on how they saved the seeds, which plants they decided to take seeds from and anything else they noticed about saving the seeds. Next students will dry their seeds (in the sun, out of the rain or in a dehydrator) as needed and then label and store them. 3) A week or two later, have the students do some germination tests to determine the viability of their seeds. They will put 20 of the collected seeds in a sealable baggy rolled in a damp paper towel (make sure the seeds aren’t touching to prevent mold). Place the baggy in a warm space. After about 5 days the seeds should have germinated. They will determine the % of viability for each batch of seeds collected and extrapolate what that will mean when they go to plant the seeds later. (Low germination means that you want to plant more seeds to ensure that some will survive.) 4) Using the germination rates, students will decide which seed saving technique from all the groups worked best for saving each type of seed. They can also compare the viability of their seeds to store bought seeds and seeds you have saved using best practices. They can now plant out their germinating seed or use them to start seeds inside during the cold season. STEM Professional Connection: This would be a great activity for a plant breeder/farmer who saves seeds to come talk to students about seed saving. Build a Seed Length- 30 min-1 hour Materials- recycled materials, seeds, example seed dispersal seeds Preparation- gather recycled materials 1) Explain to students that they are going to be designing a seed that moves in some way. Ask students why plants would want their seeds to move around (so they can spread, less competition). In small groups, have students brainstorm ways that seeds move around. o Floats on air: milkweed, dandelion, cottonwood o Flies through air: maple, ash o Floats on water: coconut o Bounces or rolls: acorns, walnut o Eaten by animals: cherry, apple o Stored by animals: acorns o Thrown: violet, lupine o Sticks to animals: cocklebur, foxtail, goldenrod 2) Next, have students go out in the garden. Divide the class into small groups and have them walk around the garden area, pick up any seeds they find on the ground, and collect the seeds. OR: have students drag an old blanket or other piece of fuzzy cloth through the area, or have them wear large, old wool socks over their shoes and walk around the area. (Give them 10-15 minutes for this step.) In their groups, let the students discuss how they think the seeds they found are dispersed. 3) Now that the students have seen examples of different seeds and their dispersal patterns, challenge them to create a seed that has its own specialized dispersal pattern. Students can use a dried bean (mung beans are good for this) as the base of their design, along with “junk” materials (such as popsicle sticks, toothpicks, cardboard, egg cartons, cotton balls, string and rubber bands), to design a seed. 4) Give them 10-15 min to make their seed, then test the seeds to see if they work as intended. Give them time to re-design their seed and try again after the first try. Here are some challenges to inspire creativity and have students use various measurements: o Floats in water for at least five minutes o Floats in air for at least 5 feet o Sticks to an animal and can be carried at least 10 feet o Is thrown at least 2 feet away from the parent plant STEM Professional Connection: This would be a good activity for an engineer or design student to talk to the students about designing objects. Activities The activities below can be used to introduce or review the project concepts. Seed Match Length- 5-10 minutes Materials- bagged seeds and plant cards Preparation- make seed match bags In this activity, students try to match seeds with the plant that they come from. This simple game is a kid favorite and is a great way for students to focus on observational skills and details. Explain their goal. Once they’ve matched all their cards and seeds, check their answers. Show them which matches are right and which are wrong. Give them another minute to rematch until they match everything correctly. Then have them trade cards and seeds with another group and try again. Plant Life Cycle Length- 10 minutes Materials- life cycle cards Preparation- gather/make cards This activity is a simple introduction to plant life cycles that can also double as a team challenge game. Give each student a plant life cycle card. Their goal as a group is to look at all the cards and stand in the correct order of the plant’s lifecycle based on the card they’re holding. You can make this more challenging by having them do this activity silently. Once they think they have it, go through the life cycles stages with the group. Explain that the plant life cycle doesn’t really start and stop. It’s a cycle that continues year after year. Turn their line into a circle to demonstrate this. Seed Dissection Length- 5-15 minutes Materials- pre-soaked beans, bean seed sheet, examples of seeds Preparation- soak bean seeds overnight A seed dissection will help students understand the mechanics of how seeds work. Show the students a seed. Ask them what the seed will turn into. Emphasize how amazing it is that one tiny seed has the potential to create such a BIG plant. Distribute one soaked bean seed to each student with instructions to make at least one observation. Have the students share some observations. Next, go through the dissection. As they remove and look at each part, ask the students to think about what that part might do for the seed/future plant. Let them make hypothesis before giving away any answers. Have the students gently remove the seed coat and display it on their finger. The seed coat protects everything else inside. It keeps out bacteria and makes it harder for bugs to eat the seed. Sometimes these are really soft coats (like on peanuts or beans) but sometimes they’re really hard like in peaches or walnuts. Open up the two halves of the bean seed and look for the embryo. The embryo is the plant's first leaves and root. Ask students what will emerge from the seed coat first—the root or leaves. The root comes out first, establishing the plant's foundation. (If it’s an older group you can share with them that the first leaves are actually not photosynthesizing leaves but the second pair are, called “true leaves.” When we harvest leaves to eat, we are eating “true leaves.”) Focus lastly on the cotyledon, which is essentially food the seed can use to sprout and grow into a plant. (Seeds are so good for us to eat because they contain all the nutrients/proteins/fats/carbs needed in order to grow into a plant). By the time the seed has used up all the food stored in the cotyledons, it is able to make its own food using sunlight. Around the World Seeds Length- 10-15 minutes Materials- different types of seeds for the students to try, world map Preparation- gather the seeds and pre-cook Seeds are often staple foods in many cultures. This simple activity gets students thinking about why seeds are so important for people. Share 6-10 edible seeds that are important to human culture. (Rice, wheat, corn, pumpkin seeds, sunflowers, oats, flax, buckwheat, beans). Ask students to guess where these plants are most commonly eaten and where they originated (you’ll need a world map and the answers). Then show them by using a world map. Finish with a taste test of the different seeds, explaining why seeds are so good for us to eat. Seed Collage Length- 15-30 minutes Materials- cardboard, glue, lots of old large seeds, pens, scissors, paper, pencils Preparation- cut out pieces of cardboard, gather materials This is a good way to marvel at all the different shapes and colors seeds come in and use some of those old seeds that are hanging around the garden shed! Students will create a collage with seeds. For younger students, have some shapes for them to trace and then fill in on the cardboard pieces. Older students can make their own drawing to fill in. Students will draw the outline of their design on a piece of paper first. They’ll then cut it out and trace their design on the cardboard. Next, using many different types of seeds, they will begin to fill in their design, gluing seeds as they go and then spreading glue on top of the whole design once finished to keep it in place. Seed Tape Length- 15 minutes Materials- newspaper cut into strips, flour, water, seeds Preparation- cut newspaper It can be hard for younger children in particular to space seeds correctly when they plant them. Seed tape is a great way to make this easier. Mix flour and water together to create a runny paste. Have the students spread that on a newspaper strip. Then pick some seeds that they want to plant. Talk about the importance of plant spacing and read the spacing instructions on the seed packet. Carefully place the seeds in a line on the newspaper with the correct spacing. Let the seed tape dry and then bury the whole strip underground and wait for the seeds to sprout! Living Necklace Length- 15 minutes Materials- very small plastic bags, cotton ball, string, hole punch, bean/pea seeds Preparation- pre-punch holes in plastic baggies Living Necklaces are a great way for students to watch how seeds sprout and grow. Each student will get a cotton ball, three seeds, a plastic bag and some string. They will dampen their cotton ball and put the seeds in the bag next to it. Have them make guesses on how many days they think it will take for their seeds to sprout. They can write their guesses on their necklace. Once the seeds sprout, take them outside to plant in the garden. Ask them if they were surprised at how long or short a time to took for their seeds to sprout. |
Objectives
Students will be able to: • list one plant and it’s growing season • design and create a simple season extender Oregon Content Standards: 1.2L.1 Describe the basic needs of living things. 2.2E.2 Record and summarize daily and seasonal temperature changes. 2.4D Engineering Design: Engineering design is a process used to design and build things to solve problems or address needs. 3.4D.1 Identify a problem that can be addressed through engineering design, propose a potential solution, and design a prototype. 4.2L.1 Describe the interactions of organisms and the environment where they live. 4.4D Engineering Design: Engineering design is a process of using science principles to solve problems generated by needs and aspirations. 5.4D.2 Design and build a prototype of a proposed engineering solution and identify factors such as cost, safety, appearance, environmental impact, and what will happen if the solution fails. 7.4D.1 Define a problem that addresses a need and identify constraints that may be related to possible solutions. 7.4D.2 Design, construct, and test a possible solution using appropriate tools and materials. Evaluate the proposed solutions to identify how design constraints are addressed. ET.3 Research and Information Fluency: Students select and apply digital tools to gather, evaluate, validate, and use information. 2.MD.10 Draw a picture graph and a bar graph (with single-unit scale) to represent a data set with up to four categories. Solve simple put together, take-apart, and compare problems using information presented in a bar graph. Vocabulary Season extender, cloche, cold-frame, greenhouse Garden Tasks o Plant fall/winter/early spring crops o Clean up the garden after the fall harvest o Water plants under season extenders if needed |
Module 3: Developing a Locally- Based Food System
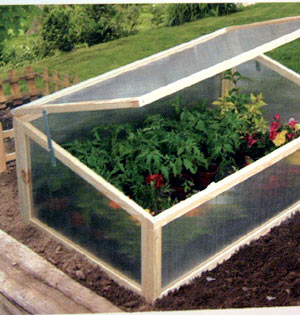
Season Extenders Season Extenders PDF Background Season extenders are a great way to increase the amount of produce you can get from your garden. In the mild climate of the Willamette Valley, a few simple extenders can mean year-round food. You can use them to cover garden beds so you can keep things alive longer into the fall or so you can start things earlier in the spring. Here are examples of a few different types of season extenders. Floating row covers help protect young plants from late frosts. Made out of fabric, young plants push up the sheet as they grow. Cloches are portable structures designed to protect plants from cold air. There are many types. The amount of heat trapped by the cloche depends on the materials used. They can be small enough to cover just one plant- like a plastic bottle covering a seedling, or big enough to cover an entire row of plants. Usually glass, remay fabric cloth or plastic are used. Most cloches have simple construction out of inexpensive materials. They are easy to set-up, deconstruct and move. Cold-Frames use a passive solar design to heat up the air around plants. Using glass or hard plastic and a wooden frame, these are more or less permanent structures that are still moveable. They do require a bit more construction skills that cold-frames but they’re also more airtight and will keep plants warmer. The glass/plastic lid is angled toward the south to maximize sun exposure. They’re great for hardening off starts before planting them out in the garden or growing lettuce through the winter. There are many different types of greenhouses. These are permanent structures that you can usually walk into. The walls are plastic or glass. Basically, it’s a building designed for growing things. Some have electricity with extra heating or light, some rely on the sun. Greenhouses allow you to grow plants throughout the winter without having to worry about outside conditions. They are also expensive to build or buy. Project Building Season Extenders Length- two-four 1 hour sessions, longer if using this as a basis for an experiment Materials- internet and computer access, seed packets, thermometers, pencils, graph paper, hammer, nails, screws, plastic sheets/bottles, remay cloth, various other building materials Preparation- determine what sort of season extenders will work best for your garden and price out materials so you know what students will be able to do 1) Start by reviewing what plants need to grow. Beyond the basics, one very important need is heat/warmth. Have the students look at some seed packets. On the packets, they should be able to find the necessary temperature for the seeds to sprout and grow. Ask them how they can find out if this is a good time of year to plant these seeds? One way is to take some temperature readings to see if the current temperature of the air and soil match the needs of the seeds. Use both regular and soil thermometers to check the temperature in various parts of the garden. See if there are warmer and cooler spots. Students will record their findings. They can also check to see what the current day and night temperatures are in their area using on-line resources. In groups/pairs, have the students use their findings to determine if it would be ok to plant the seeds. Next, have them make a graph showing the average day and night temperatures throughout the year. They will mark on their graph which months they could plant their seeds in. 2) Knowing all of the above, their goal is to figure out some way that they could extend the growing season for their seeds. How can they make the temperature warmer in the garden during the colder months? Give them 10-15 minutes in small groups to brainstorm some ideas. After awhile, have them look at their ideas and figure out which ones are actually going to be feasible. 3) Have a local farmer or gardener come in to talk to the students about various season extenders. Using this expert advice, students will then design their own season extenders in groups. Their design needs to have materials listed, and the measurements of each of the materials. For younger students, simplify this by having them all make the same thing. Cloches are an easy and simple option. Each group will get to decide what materials they want to make theirs out of- plastic, fabric, glass? Older students could take on the building of a more permanent structure like a cold frame or a mini-greenhouse. You may want to only build one with the whole class depending the cost of materials and difficulty of the construction. 4) After they have their design they will build their season extender. They can put it over plants that are already growing or plant new seeds or starts. You can use the season extenders to make an experiment to determine the effectiveness of various types. (Look at Module 2- Plant Needs for ideas on how to do an inquiry based experiment with students.) If the students have already done the Plant Needs Experiments, challenge them to this time make a more detailed hypothesis and procedure. ex. Instead of a hypothesis that states, ‘plants in the cloche will grow better than plants not in the cloche’, do something like this- ‘plants in the cloche will grow 2” taller than plants not in the cloche.’ 5) After building the season extenders and using them, have students blog about the findings and give directions for how others can make a similar season extender. STEM Professional Connection: This would be a great time to have a local farmer or master gardener come give students some ideas about the usefulness of season extenders and/or how to build them. Activities The activities below can be used to introduce or review the project concepts. Transplant Game- Season Extenders Version Length- 10-20 minutes Materials- red and blue cards Preparation- lay out a playing field and decide which plants students will be for the game This game is like red light/green light. It’s a good way to discuss the pros of using season extenders. Give each student a card. Those with red cards are going planted under a cloche in the early spring. Those with a blue card are going to be planted without a cloche in the early spring. Have an adult be the signaler- when they turn so their back is to the group, the students run toward them. As soon as they turn to face toward the students again, the students have to freeze. The signaler should be pretty far across a field from the students. When a student gets to the signaler they have matured! When you start it is early February. They are all going to be planted. Anyone with a blue card can start out jumping on one foot. Anyone with a red card is going to be walking. As the months go on during each round, slowly increase the pace of movement for both groups until they are both running: o February: blue- hop on one foot, red- one foot moves every 5 seconds o March: blue- hop on two feet, red- hop on one foot o April: blue- skipping, red- hop on two feet o May: blue- running, red- skipping o June: blue- running, red- running The game ends when everyone has gotten past the signaler. Use this activity to talk about the extra jumpstart season extenders can give seeds/plants in the early spring. Greenhouse Fieldtrip Length- 30 min-2 hours (dependant on travel time) Materials- none Preparation- permission slips, set up a time with the owner of the greenhouse, figure out transportation If possible, a fieldtrip to a nearby greenhouse would be a great way to learn about more permanent season extenders. Where in the world do I come from? Length- 10 minutes Materials- harvest trading cards, world map, season signs Preparation- gather materials Give each student a harvest trading card. Have them put their harvest card on a large world map where they think that plant originated from. Then flip the cards over one at a time and put them where they actually originated. Talk about how there are hot spots in the world where many plants originated from as formal agriculture got started. You can do the same thing with the harvest trading cards only talking about the seasonality of different crops. Put out season signs: fall, winter, spring, summer. Have the students put their card under the sign they think their plant best grows in. They can put them in between two signs if they think the plant grows best in more than one season. Then flip the cards over to see which season they like best. This is often tied to the part of the world the plant originated in and the weather patterns of that place. |

